Upgrade Your Bathroom with IP44 Waterproof Wall Light

Looking to upgrade your bathroom lighting? An IP44 waterproof wall light is a solid choice. It means the light is protected against solid objects larger than 1 millimeter (think wires, tools) and against splashing water from any direction. This makes it perfectly suitable for Zone 2 in your bathroom, which is the area directly above your sink, or around the perimeter of your shower/bath, as well as Zone 3, the furthest zones from water sources, where splashing is unlikely but still possible. Choosing an IP44-rated fixture ensures safety and compliance with electrical regulations in most regions, giving you peace of mind that your light can handle the humidity and occasional splashes of a bathroom environment without risking electrical faults.
Understanding bathroom zones is crucial for safety and for selecting the correct lighting. These zones are defined by how close they are to a water source, and each zone has specific IP (Ingress Protection) rating requirements for electrical fixtures. Getting this right prevents electrical hazards and ensures your installation complies with local building codes.
Demystifying IP Ratings
The IP rating consists of two digits. The first digit relates to protection against solids, and the second digit relates to protection against liquids. For bathroom lighting, the second digit is particularly important.
- First Digit (Solids): Ranges from 0 (no protection) to 6 (dust tight). An ‘X’ means no data available.
- Second Digit (Liquids): Ranges from 0 (no protection) to 8 (protected against prolonged immersion). Again, an ‘X’ means no data.
An IP44 rating means the light is protected against solid objects larger than 1mm (like a human finger or a tool) and against splashing water from any direction.
The Zones Explained
Let’s break down the typical bathroom zones:
- Zone 0: This is inside the bath or shower tray itself. Any fitting here needs to be low voltage (max 12V) and have an IP rating of at least IPX7 (protected against temporary immersion). Think underwater lighting or lights directly integrated into a shower head.
- Zone 1: The area directly above the bath or shower, up to a height of 2.25 meters from the floor. Fittings here require an IP rating of at least IPX4 (protected against splashing water from any direction). An IP65 fixture often provides an extra layer of protection, especially for direct shower spray.
- Zone 2: This zone extends 0.6 meters outside the perimeter of the bath or shower and above the wash basin, up to a height of 2.25 meters. IP44 is the minimum requirement for this zone. This is where most wall lights are installed.
- Zone 3 (or Outside Zones): Any area outside Zones 0, 1, and 2, where no water jet is likely to be used. While no specific IP rating is technically required, it’s generally good practice to use at least IP20 for durability, especially with humidity.
An IP44 wall light is perfectly suited for Zone 2, making it a versatile choice for areas around your mirror, sink, or generally outside the direct splash zone of your shower or bath. While it meets the minimum for Zone 2, it’s also more than adequate for Zone 3, providing robust protection against general bathroom humidity.
Practical Considerations for Installation
Installing an IP44 wall light isn’t overly complicated, but it does require attention to detail, especially regarding electrical work. If you’re not confident with electrical wiring, it’s always best to call a qualified electrician. Safety should be the top priority.
Pre-Installation Checks
Before you even open the box, a few things need to be considered:
- Power Supply Location: Identify where your existing wiring is. This will often dictate the best placement for your new wall light. If you’re moving the light or adding a new one, you might need an electrician to run new cabling.
- Wall Material: Consider if your wall is plasterboard, tile, or something else. This affects the type of fixings you’ll need.
- Light Switch Compatibility: Most wall lights are straightforward, but some might require specific switches (e.g., if you’re using dimmable bulbs).
- Switch Off Power: This is non-negotiable. Always, always turn off the mains power to the circuit you’ll be working on at your consumer unit (fuse box). Use a voltage tester to double-check the circuit is dead before touching any wires.
The Installation Process (General Steps)
While specific instructions vary by fixture, here’s a general outline:
- Remove Old Fixture (if applicable): Disconnect the old light, carefully noting how it was wired.
- Attach Mounting Bracket: Secure the new light’s mounting bracket to the wall. Use appropriate screws and wall plugs for your wall type. Ensure it’s level.
- Wire the Light: This is the most critical step. Connect the wires from your mains supply to the corresponding terminals on the light fixture.
- Live (Brown or Red): Connect to the Live (L) terminal.
- Neutral (Blue or Black): Connect to the Neutral (N) terminal.
- Earth (Green/Yellow): Connect to the Earth (E) terminal. This is crucial for safety.
- Double-check all connections are secure and no bare wires are exposed.
- Mount the Light Fixture: Carefully attach the light fixture to the mounting bracket. This often involves screwing the fixture onto the bracket or securing it with small screws.
- Seal and Test: Ensure any included rubber gaskets or seals are correctly seated to maintain the IP44 rating. Once everything is secure, restore power and test the light.
Professional Help
When in doubt, call an electrician. It’s a small investment for peace of mind and to ensure your bathroom lighting is installed safely and to code. They can also advise on the best placement for multiple lights and ensure adequate illumination.
Aesthetics and Design Versatility
An IP44 wall light isn’t just about safety; it’s also a key element in your bathroom’s design. The market offers a vast array of styles, finishes, and sizes, allowing you to perfectly match your existing décor or create an entirely new look.
Matching Your Bathroom Style
Think about the overall aesthetic you’re aiming for:
- Modern/Minimalist: Look for sleek, geometric designs, often in chrome, black, or brushed nickel. Integrated LED strips or frosted glass diffusers can enhance this look.
- Traditional/Classic: Opt for fixtures with more ornate details, perhaps in bronze, brass, or antique finishes. Shades might be fabric (if IP-rated) or frosted glass in a classic shape.
- Industrial: Exposed metal, cage designs, and raw finishes like matte black or gunmetal work well. Think filament-style LED bulbs.
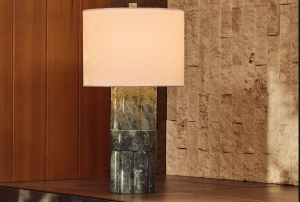
- Spa-like/Natural: Warm wood accents (ensure they are appropriately sealed for bathroom use), soft, diffused light, and organic shapes can create a calming atmosphere.
Placement for Optimal Illumination
The placement of your wall light significantly impacts both the functionality and the ambiance of your bathroom.
- Above the Mirror (Overhead): A single wall light placed centrally above the mirror provides general illumination for shaving, applying makeup, or brushing teeth. Be mindful of shadows this can cast.
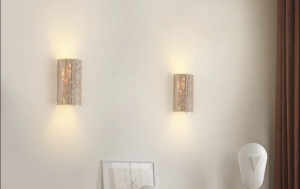
- Beside the Mirror (Sconces): Two wall lights, one on either side of the mirror, are often the most effective for task lighting. This setup minimizes shadows on your face, providing even illumination. Aim for them to be roughly at eye level.
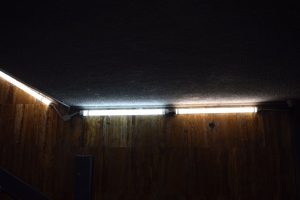
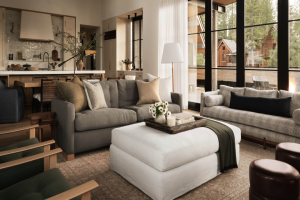
- General Ambient Lighting: In a larger bathroom, additional wall lights can be placed strategically to provide overall ambient light, perhaps near a bathtub or in a less frequently used corner, creating a softer glow.
- Accent Lighting: Smaller, directionally adjustable wall lights can highlight architectural features, artwork, or shelves, adding depth and interest to the space.
Finishes and Materials
Consider the material and finish of the light fixture in relation to your other bathroom elements like taps, showerheads, and cabinet handles.
- Chrome: A popular choice, offering a bright, reflective, and modern look. Easy to clean but can show water spots.
- Brushed Nickel/Stainless Steel: More subdued than chrome, with a matte or satin finish. Hides fingerprints and water spots better.
- Black/Bronze/Brass: Can add warmth, a touch of tradition, or a bold modern statement depending on the design.
- Glass/Acrylic Diffusers: These materials soften the light and prevent glare. Choose frosted for a more diffused glow or clear for a crisper look.
Ultimately, the goal is to choose a light that not only meets the safety requirements but also enhances the visual appeal and functionality of your bathroom.
Energy Efficiency and Bulb Choices
Modern IP44 wall lights are designed with energy efficiency in mind, primarily due to the widespread adoption of LED technology. This not only saves you money on your electricity bill but also reduces the frequency of bulb replacement.
The LED Advantage
LED (Light Emitting Diode) bulbs are the standard for most new light fixtures for several good reasons:
- Energy Efficiency: LEDs use significantly less electricity than traditional incandescent or even CFL (Compact Fluorescent Lamp) bulbs to produce the same amount of light. This translates to lower energy bills.
- Long Lifespan: LEDs last much longer than other bulb types, often tens of thousands of hours. This means fewer trips to the store for replacements, especially for hard-to-reach fixtures.
- Durability: LEDs are solid-state devices, making them more resistant to vibrations and breakage than delicate filament bulbs.
- Instant On: Unlike some CFLs, LEDs provide instant full brightness without a warm-up period.
- Low Heat Output: LEDs produce very little heat, which is a bonus in a bathroom where ventilation is key.
- Dimmable Options: Many LED bulbs are dimmable, allowing you to adjust the light intensity to create different moods. Always check if the bulb and the fixture are compatible with dimmers.
Lumens, Watts, and Color Temperature
Understanding these terms helps you choose the right light for your needs:
- Lumens (lm): This measures the brightness of a light source. Don’t rely on watts to indicate brightness for LEDs, as their wattage is very low. Look for lumens. For bathroom task lighting (sink area), you might want around 800-1000 lumens per side fixture, or a combined 1500-2000 lumens for an overhead fixture. For ambient lighting, you’ll need less.
- Watts (W): This measures energy consumption. LEDs offer excellent lumens per watt. A 10W LED bulb might produce the same light as a 60W incandescent.
- Color Temperature (Kelvin – K): This describes the perceived warmth or coolness of the light.
- 2700K – 3000K (Warm White): A warm, yellowish glow, similar to traditional incandescent bulbs. Good for creating a relaxing, spa-like atmosphere.
- 3500K – 4000K (Cool White/Neutral White): A more neutral, slightly whiter light. Good for task lighting, as it provides better clarity.
- 5000K – 6500K (Daylight): A very bright, bluish-white light, simulating natural daylight. Excellent for detailed tasks like makeup application, but can feel harsh for relaxation.
For bathrooms, a common approach is to use 3000K-4000K for task lighting around the mirror for better visibility, and potentially warmer temperatures (2700K-3000K) for other ambient lighting if you want a softer feel. Alternatively, dimmable lights with adjustable color temperature can offer the best of both worlds.
Integrated LEDs vs. Replaceable Bulbs
Some IP44 wall lights come with integrated LED modules, meaning the LEDs are built into the fixture itself and are not designed to be replaced by the user. Others use standard bulb sockets (like E27 or GU10), allowing you to choose and replace the LED bulbs yourself.
- Integrated LEDs: Often allow for sleeker designs and can sometimes offer better light distribution. When the LED module eventually fails (which can be decades), the entire fixture usually needs replacing.
- Replaceable Bulbs: Offers flexibility in choosing lumens, color temperature, and dimming capabilities from various manufacturers. If a bulb fails, you only need to replace the bulb.
Consider your preference for design versus long-term flexibility when making your choice. Both offer the energy efficiency benefits of LED technology.
Maintenance and Longevity
An IP44 waterproof wall light, when properly chosen and installed, requires surprisingly little maintenance. Its design is specifically intended to protect the internal components from the bathroom environment, which significantly contributes to its longevity.
Basic Cleaning
The primary maintenance task will be cleaning the exterior of the fixture.
- Regular Dusting: Use a dry, soft cloth or a feather duster to regularly remove dust build-up.
- Wipe Down: For water spots or grime, use a slightly damp, soft cloth with a mild, non-abrasive cleaner. Avoid harsh chemicals, as these can damage the finish or the seals over time.
- Dry Thoroughly: After wiping, ensure the fixture is dried completely to prevent water spots, especially on chrome or highly polished finishes.
- Turn Off Power: Always turn off the power to the light before cleaning, especially if you’re using a damp cloth.
Checking Seals and Gaskets
While not a frequent task, it’s a good idea to periodically (perhaps yearly or bi-annually) inspect the seals and gaskets on your IP44 fixture, particularly if it’s in a highly splash-prone Zone 2 area.
- Visual Inspection: Look for any signs of cracking, drying, or degradation in the rubber or silicone seals that prevent water ingress.
- Tightness: Ensure any covers or diffusers that rely on these seals are securely fastened. If seals appear compromised, contact the manufacturer or a qualified electrician for advice on replacement or repair. A damaged seal could compromise the IP rating.
Bulb Replacement (if applicable)
If your fixture uses replaceable LED bulbs, their longevity means this won’t be a frequent task.
- Safety First: Always turn off the power to the light fixture at the circuit breaker before attempting to replace a bulb.
- Correct Bulb Type: Ensure you replace the bulb with one of the correct cap type (e.g., E27, GU10) and wattage equivalent (in lumens) as specified by the fixture or your preference. If it’s a dimmable fixture, ensure the new bulb is also dimmable.
- Handle with Care: Allow a bulb to cool before handling. Wear gloves if possible to avoid leaving fingerprints which can etch onto some bulb types.
- Recycle: Dispose of old bulbs responsibly.
Addressing Issues
- Flickering/Malfunction: If your light starts flickering or stops working, first check the bulb (if replaceable). If the issue persists, or if it’s an integrated LED, it could indicate a wiring problem or a fault with the fixture itself. In such cases, it’s best to consult an electrician. Do not attempt to fix electrical faults yourself unless you are qualified.
- Water Ingress: If you notice any signs of water inside the fixture (condensation, rust, or visible droplets), immediately turn off the power to that circuit and call an electrician. This indicates a compromise in the IP rating and poses a safety risk.
By following these simple maintenance tips, your IP44 bathroom wall light should provide safe, reliable illumination for many years.