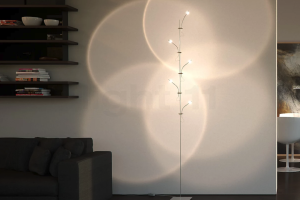
Living Room Floor Lamp Issues: Common Problems & Easy Repairs Guide

Floor lamps are pretty simple devices, but like anything with moving parts and electrical bits, they can occasionally act up. Most of the common problems you’ll encounter with a living room floor lamp are straightforward to diagnose and, thankfully, often easy to fix yourself without needing to call an electrician or buy a whole new lamp. Usually, it boils down to something loose, a burned-out component, or a simple wiring hiccup. Let’s dive into some of the most frequent issues and how you can get your lamp shining bright again.
Understanding Your Floor Lamp’s Anatomy
Before we start tinkering, it’s helpful to know the basic parts of a typical floor lamp. Knowing these terms will make troubleshooting much clearer.
The Plug and Cord
This is how your lamp gets power from the wall outlet. The cord runs from the lamp base to the plug. Damage here can completely cut off power.
The Switch Mechanism
Whether it’s a rotary switch on the pole, a foot switch on the cord, a pull chain, or a touch sensor, this component controls the flow of electricity to the bulb. Switches are a common point of failure.
The Socket
This is where the light bulb screws in. It houses the electrical contacts that complete the circuit to the bulb. Over time, these contacts can become corroded or bent.
The Bulb
The light-producing component itself. While it seems obvious, a dead bulb is often overlooked as the culprit.
The Wiring
Internal wires connect all these components. They carry the electrical current. Loose connections or frayed wires can cause intermittent operation or complete failure.
The Base and Pole
These provide structural support. While less prone to electrical issues, a wobbly base or bent pole can sometimes lead to internal wire damage if the lamp has been dropped or moved roughly.
Common Power-Related Problems
When your lamp isn’t lighting up at all, or only does so intermittently, it’s usually a power supply issue. This section covers what to check first.
Lamp Not Turning On At All
This is the most frustrating scenario because it seems like the lamp is completely dead. But often, the fix is quite simple.
Checking the Outlet
First things first, test the outlet. Plug another small appliance, like a phone charger or a different lamp, into the same outlet. If that appliance doesn’t work either, the problem isn’t your lamp, but the outlet itself. This could be a tripped circuit breaker or a faulty outlet. Go to your electrical panel and check for any tripped breakers (they’ll be in the “off” or middle position). Flip it completely off, then back on. If the outlet still doesn’t work, consider calling an electrician.
Inspecting the Plug and Cord
Examine the lamp’s plug for any bent prongs or signs of charring. A damaged plug can prevent a good connection. Next, carefully run your hand along the entire length of the power cord, feeling for any kinks, cuts, or signs of wear, especially near the base of the lamp or where it enters the switch. A visibly damaged cord needs to be replaced, as it can be a fire hazard. For minor internal breaks, you might notice the lamp flickers when you wiggle the cord.
Replacing the Light Bulb
It sounds obvious, but a burnt-out bulb is the most common reason a lamp doesn’t turn on. Unscrew the existing bulb and replace it with a new one of the correct wattage and type. Even if the filament doesn’t look visibly broken, it could still be dead. Remember to unplug the lamp before changing the bulb to avoid accidental shocks. If your lamp uses a specialty bulb (like a halogen or LED floodlight), make sure the replacement is exactly the same type.
Intermittent Lighting or Flickering
This issue is often more annoying than a complete outage because it suggests a loose connection somewhere in the circuit.
Tightening the Bulb in the Socket
Sometimes, the bulb isn’t screwed in tightly enough, leading to an inconsistent connection. Gently but firmly screw the bulb all the way into the socket. Don’t overtighten, as this can damage the socket or the bulb.
Checking the Socket Contacts
Unplug the lamp and carefully inspect the metal tab at the bottom of the socket. This tab should make contact with the bottom of the bulb. Over time, or with overtightening of bulbs, this tab can get pushed down too far, losing contact. With the lamp unplugged, use a non-conductive tool (like a small wooden or plastic stick, or even a screwdriver wrapped in electrical tape) to gently pry the tab back up slightly. Be very careful not to bend it too far, as it can break off.
Inspecting Internal Wiring Connections
This is where things get a bit more involved. If the lamp still flickers after checking the bulb and socket, the problem might be a loose wire connection inside the lamp. This often requires disassembling part of the lamp, such as the base or the switch housing. Look for any wires that appear loose, frayed, or disconnected. If you find a loose wire, and you’re comfortable with basic electrical work, you can usually re-strip a small section of the wire and re-attach it to its terminal. If you’re unsure, it’s safer to consult a professional.
Issues with the Lamp’s Switch
The switch is a mechanical component that gets a lot of use, making it prone to wear and tear. Different types of switches have their own common failure modes.
Faulty Rotary or Push-Button Switches
These switches are often located on the lamp pole or within the base. Over time, the internal contacts can wear out or become corroded.
Testing the Switch
With the lamp unplugged, visually inspect the switch for any obvious damage. If you have a multimeter, you can test the continuity of the switch. With the switch in the “on” position, there should be continuity; in the “off” position, there shouldn’t. If the switch fails this test, it needs replacing.
Replacing the Switch
Switch replacement typically involves opening up the lamp’s base or the switch housing. You’ll need to disconnect the old switch wires and connect the new switch in the same configuration. Ensure you buy a replacement switch of the same type and rating (voltage and amperage). This is a moderately easy DIY task for someone with basic electrical knowledge. Always unplug the lamp first!
Problems with Pull Chain Switches
Pull chain switches are simple but can suffer from internal mechanical failures or worn contacts.
Clearing the Mechanism
Sometimes, the chain mechanism can get stuck or stiff. Try gently pulling and releasing the chain multiple times. If it feels gritty, a tiny bit of dry lubricant (like graphite powder) might help, but be careful not to introduce anything that could attract dust or conduct electricity.
Replacing the Pull Chain Switch
If the switch feels loose, doesn’t click reliably, or doesn’t consistently turn the light on and off, it’s likely faulty. Replacing a pull chain switch is similar to replacing a rotary switch; you’ll need to remove the old one and wire in a new one. These are inexpensive parts and readily available at hardware stores. Again, ensure the lamp is unplugged.
Malfunctioning Foot Switches or Inline Switches
These switches are on the power cord itself and are very convenient, but they can get stepped on or snagged, leading to internal damage.
Inspecting the Switch Body and Cord Entry
Check the foot switch housing for any cracks or visible damage. Also, examine the cord where it enters and exits the switch for any fraying or sharp bends, which can indicate internal wire breaks.
Replacing the Inline Switch
Most foot switches and inline cord switches are designed to be replaceable. You’ll usually need a small screwdriver to open the housing, disconnect the old wires, and connect the new ones. Make sure the replacement switch is rated for the correct voltage and current. This is usually one of the easier switch types to replace as it doesn’t require disassembling the main lamp body.
Addressing Structural and Wiring Concerns
Sometimes the issue isn’t just about a simple switch or bulb but involves the lamp’s fundamental structure or its internal wiring. These problems can be a bit more challenging but are still often repairable.
Loose or Wobbly Lamp Base/Pole
While not directly an electrical issue, a wobbly lamp can strain internal wiring connections over time or cause the lamp to tip over, leading to damage.
Tightening Connectors
Many floor lamps have sections of the pole that screw together or connect with internal threaded rods. Over time, these can loosen. Try gently twisting the sections of the pole clockwise to tighten them. If the base itself is wobbly, look underneath for nuts or screws that might have come loose and tighten them. Some lamps have a central threaded rod that runs from the base up through the pole; tightening a nut at the top or bottom of this rod can often stabilize the whole lamp.
Inspecting for Internal Wire Damage
If tightening doesn’t help, or if the lamp has been dropped, there’s a risk of internal wire damage due to movement. This usually means carefully disassembling the lamp pole to inspect the wires running through it. Look for pinched, frayed, or broken insulation. If you find damaged insulation, you can often repair it with electrical tape for minor scuffs, or by cutting out the damaged section and splicing in a new piece of wire using wire nuts or solder sleeves. If a wire is completely broken, you’ll need to re-splice it securely.
Frayed or Damaged Internal Wiring
Internal wiring damage is a fire hazard and can lead to intermittent operation or complete failure. This requires careful attention.
Visual Inspection After Disassembly
Once you’ve opened up the lamp (e.g., removed the base cover, or separated pole sections), visually inspect all internal wires. Look for discolored insulation (indicating overheating), exposed copper, nicks, or breaks. Pay close attention to points where wires pass through holes in metal, as these are common areas for insulation to wear through.
Repairing Damaged Wires
For minor fraying where the conductor isn’t exposed, electrical tape can sometimes be a temporary fix. However, for exposed copper or broken wires, a more permanent repair is needed. You’ll need to cut out the damaged section, strip back a small amount of insulation from the good ends, and join them securely. The safest and most reliable methods are using appropriate wire connectors (like twist-on wire nuts, ensuring they are correctly sized for the wire gauge) or soldering the connection and then insulating it with heat-shrink tubing. Always ensure any repair maintains good electrical contact and is thoroughly insulated.
Replacing a Section of Wire
If a significant portion of the wire is damaged, or if multiple breaks are found, it might be easier and safer to replace the entire length of wire running through that section of the lamp. Ensure the replacement wire is of the same gauge and type (e.g., SPT-1 or SPT-2 lamp cord).
Advanced Troubleshooting and When to Call a Pro
While many floor lamp issues are simple fixes, some problems are more complex or involve safety risks that are best left to experts.
Capacitor or Resistor Failure in Specialized Lamps
Some modern floor lamps, especially those with dimmers, touch controls, or integrated LEDs, may contain electronic components like capacitors or resistors.
Identifying Electronic Component Failure
If you have a lamp with complex features and basic troubleshooting hasn’t worked, and you notice a burning smell, visible scorch marks on a circuit board, or swollen capacitors, these electronic components might be the culprit. Diagnosing these typically requires a multimeter and knowledge of electronics.
Professional Repair for Electronics
Unless you have experience with soldering and circuit board repair, replacing individual electronic components is usually beyond the scope of a typical DIY lamp repair. It’s often more cost-effective and safer to replace the entire electronic module (if available) or consult an electrician or a lamp repair specialist.
Issues with Integrated LED Fixtures
Lamps with integrated LED arrays (where the LEDs aren’t replaceable bulbs) present a unique challenge.
Limited User Serviceability
Many integrated LED fixtures are designed as sealed units. If the LEDs fail, or the driver (the component that powers the LEDs) malfunctions, repair options are often limited. Sometimes the LED driver is a separate, replaceable module, but other times the entire light engine is integrated.
Replacement or Specialist Repair
If your integrated LED floor lamp fails, first check if the manufacturer offers replacement LED modules or drivers. If not, and the lamp is no longer under warranty, you might be looking at replacing the entire fixture. Some specialized lamp repair shops might be able to diagnose and replace components on a circuit board, but this can be costly.
When to Call an Electrician or Lamp Repair Specialist
It’s important to know when to step back and let a professional handle it.
Continuous Circuit Breaker Tripping
If your lamp repeatedly trips your circuit breaker even after you’ve checked the bulb and basic wiring, it indicates a significant electrical fault (a short circuit) within the lamp that you haven’t been able to locate or safely repair. This is a fire hazard.
Exposed Live Wires
If you encounter exposed live wires that you cannot safely or effectively insulate and secure, or if you suspect internal damage that could lead to such a situation, stop immediately.
Lack of Confidence or Knowledge
If at any point you feel uncomfortable, unsure about a step, or lack the necessary tools or knowledge to safely perform a repair, it’s always best to err on the side of caution. Electricity can be dangerous. A professional electrician or a specialized lamp repair shop has the expertise and tools to diagnose and fix complex problems safely. They can often replace entire lamp sockets, rewire entire lamp bodies, or troubleshoot electronic issues far more effectively.
By following these troubleshooting steps and knowing when to seek professional help, you can keep your living room floor lamp illuminating your space for years to come. Most problems are minor, and a little careful investigation can save you the cost of a new lamp.